
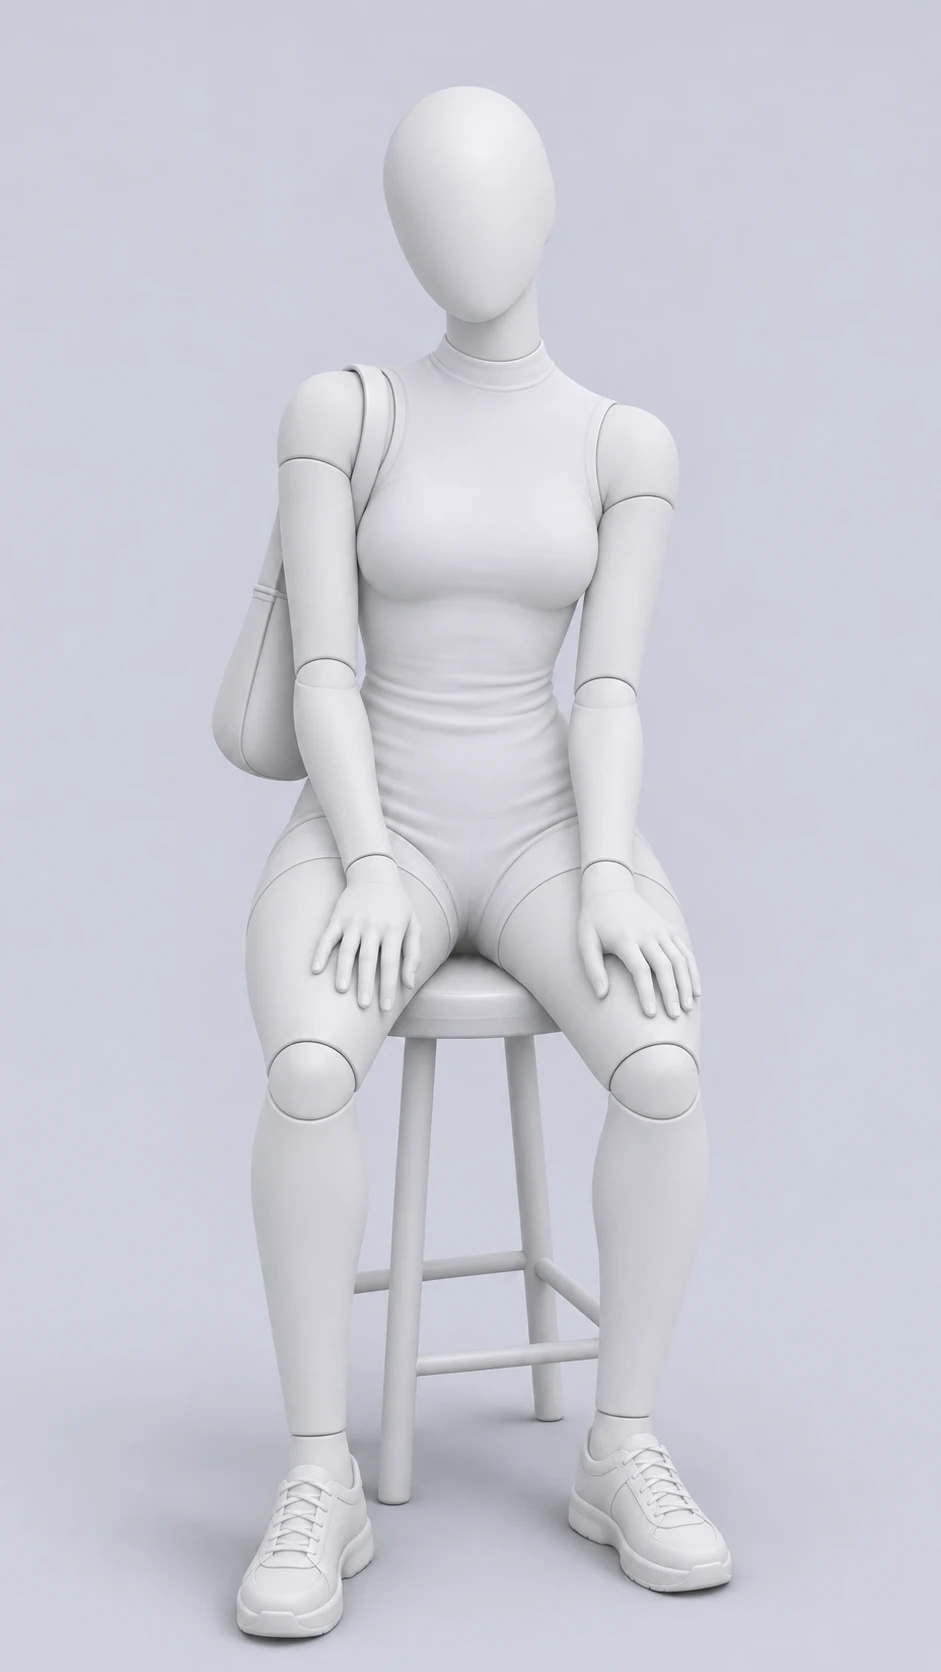
Seated facing forward
An upright front view makes the relationship between hands, thighs and seat easy to compare. Check both feet as well as the torso.
Choose a seated arrangement with clear support. Compare the chair, hips, knees and hands before borrowing a pose for your portrait.
Choose a guide below. Selecting it prepares your editor draft; generation starts only when you submit it.
An upright front view makes the relationship between hands, thighs and seat easy to compare. Check both feet as well as the torso.
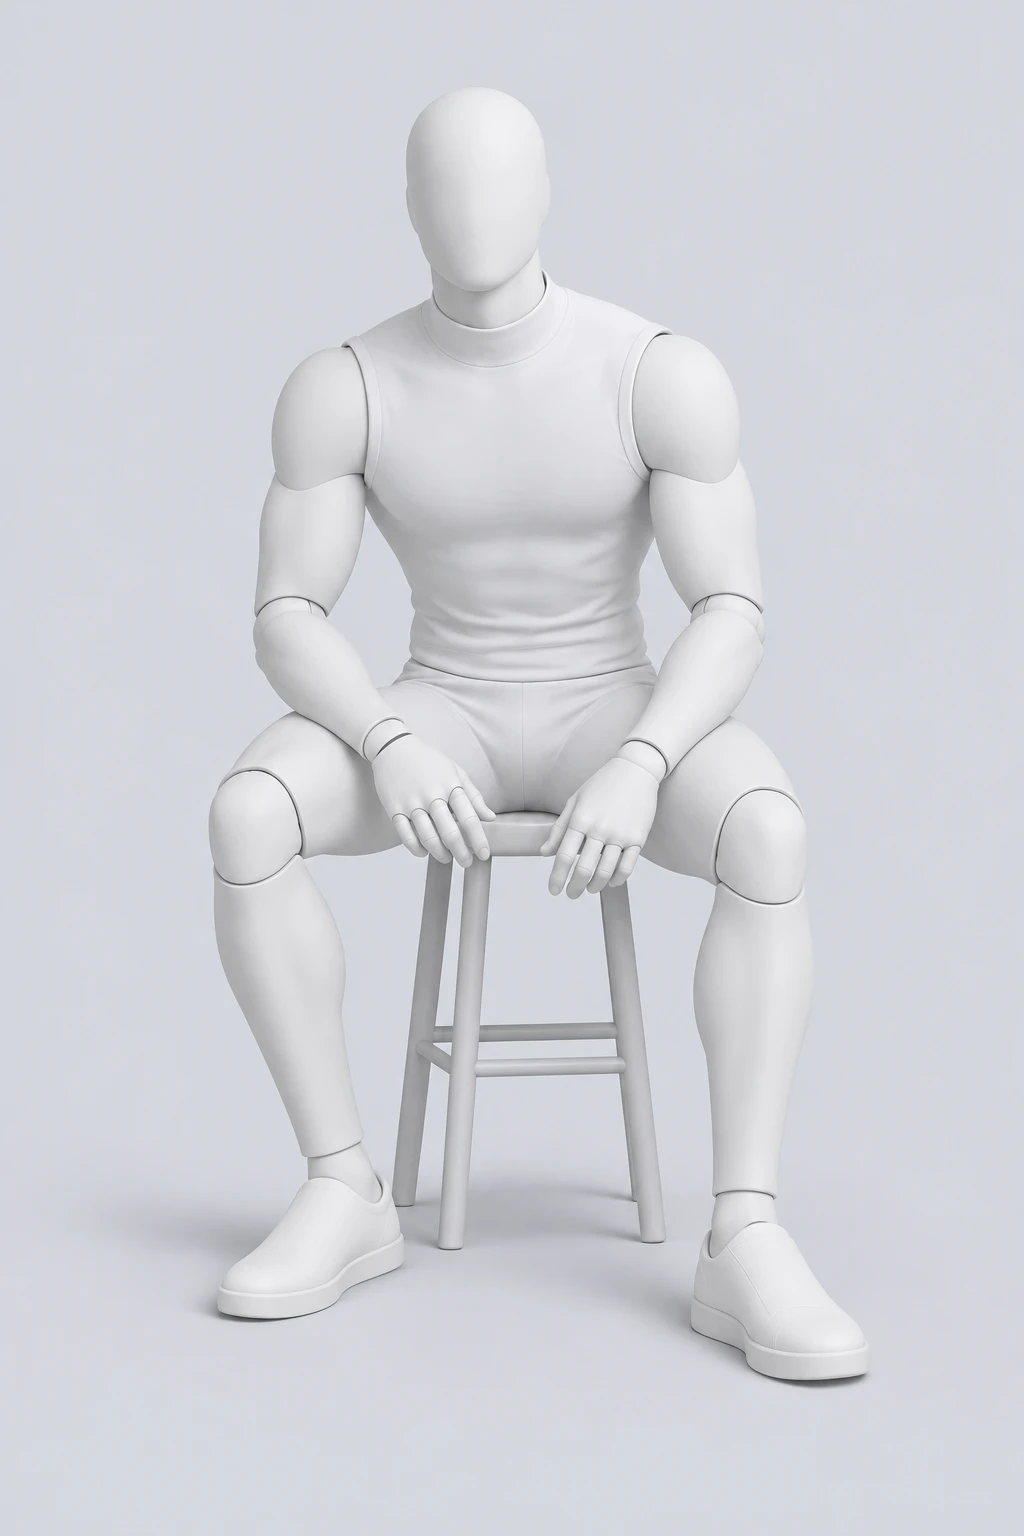
A forward lean brings the shoulders toward the knees. Look for believable support at the hips and elbows.
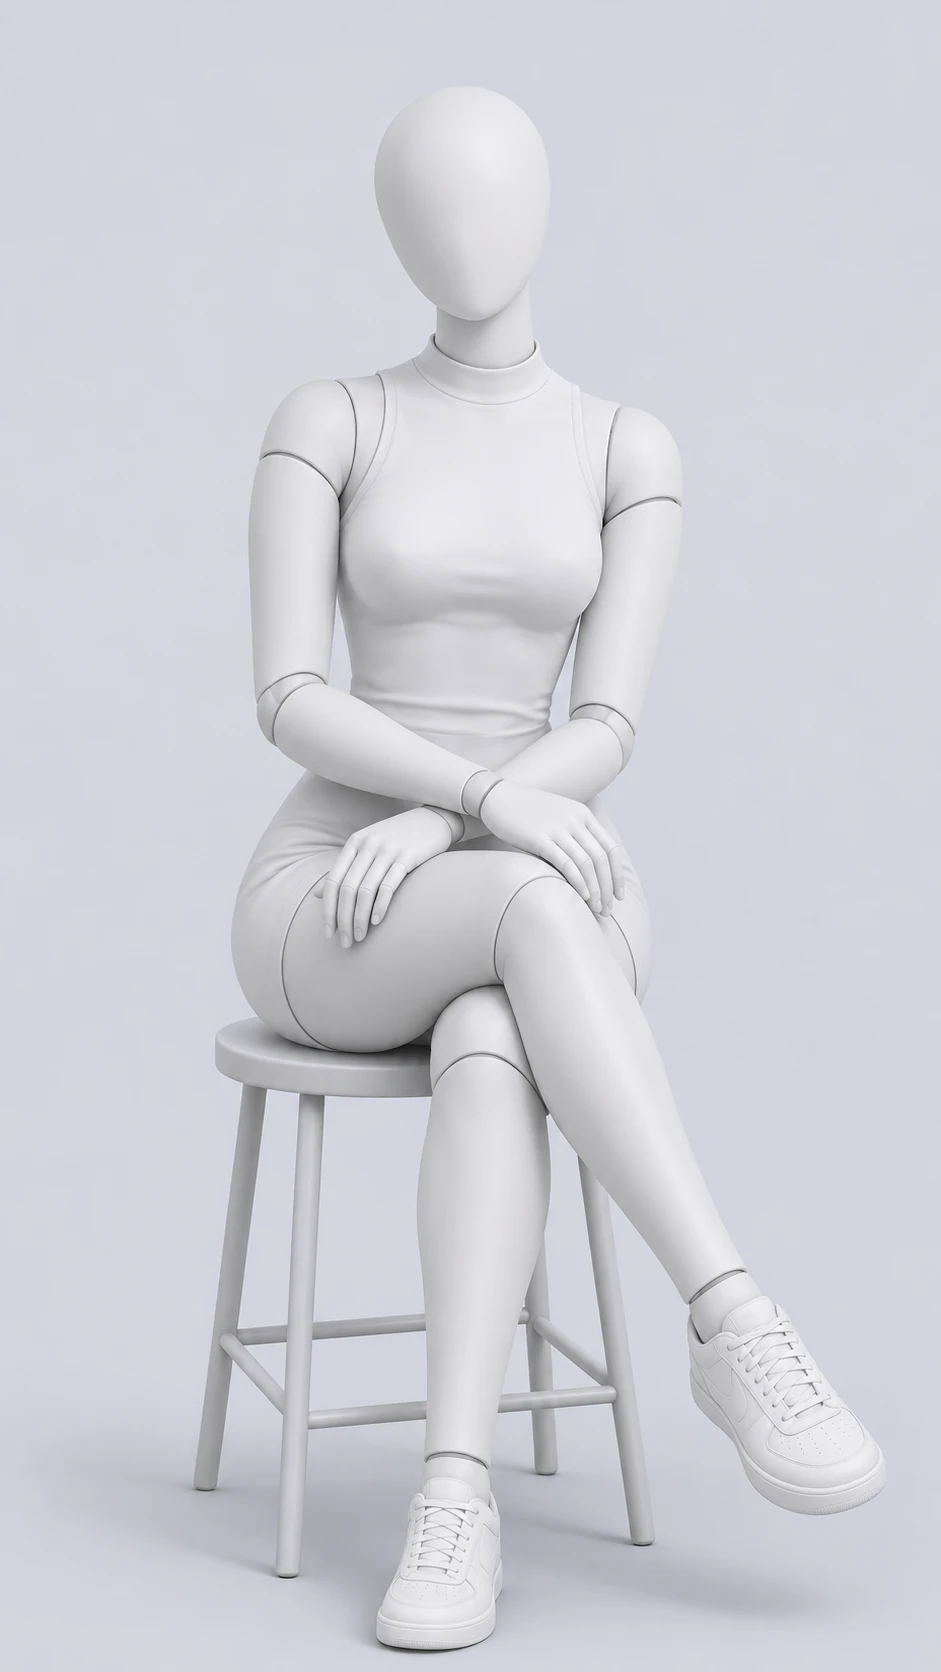
Crossed legs add overlap. Check which knee is in front and whether the garment allows the arrangement to remain clear.
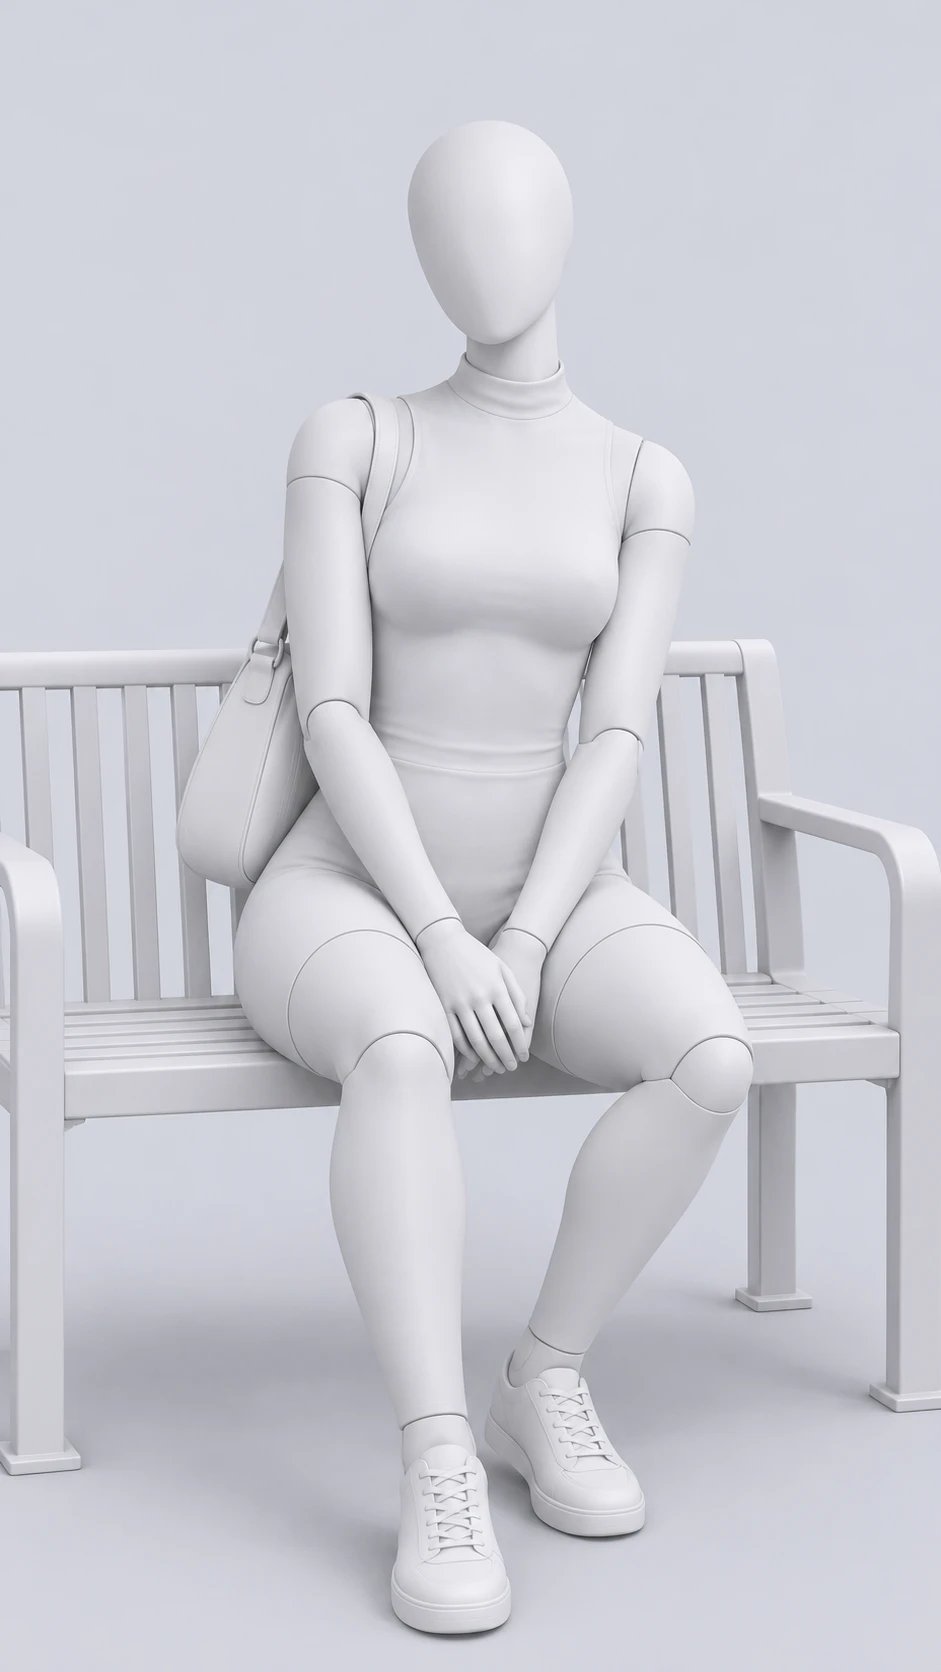
Hands in the lap create a compact gesture. Keep the wrists and fingers visible enough to review.
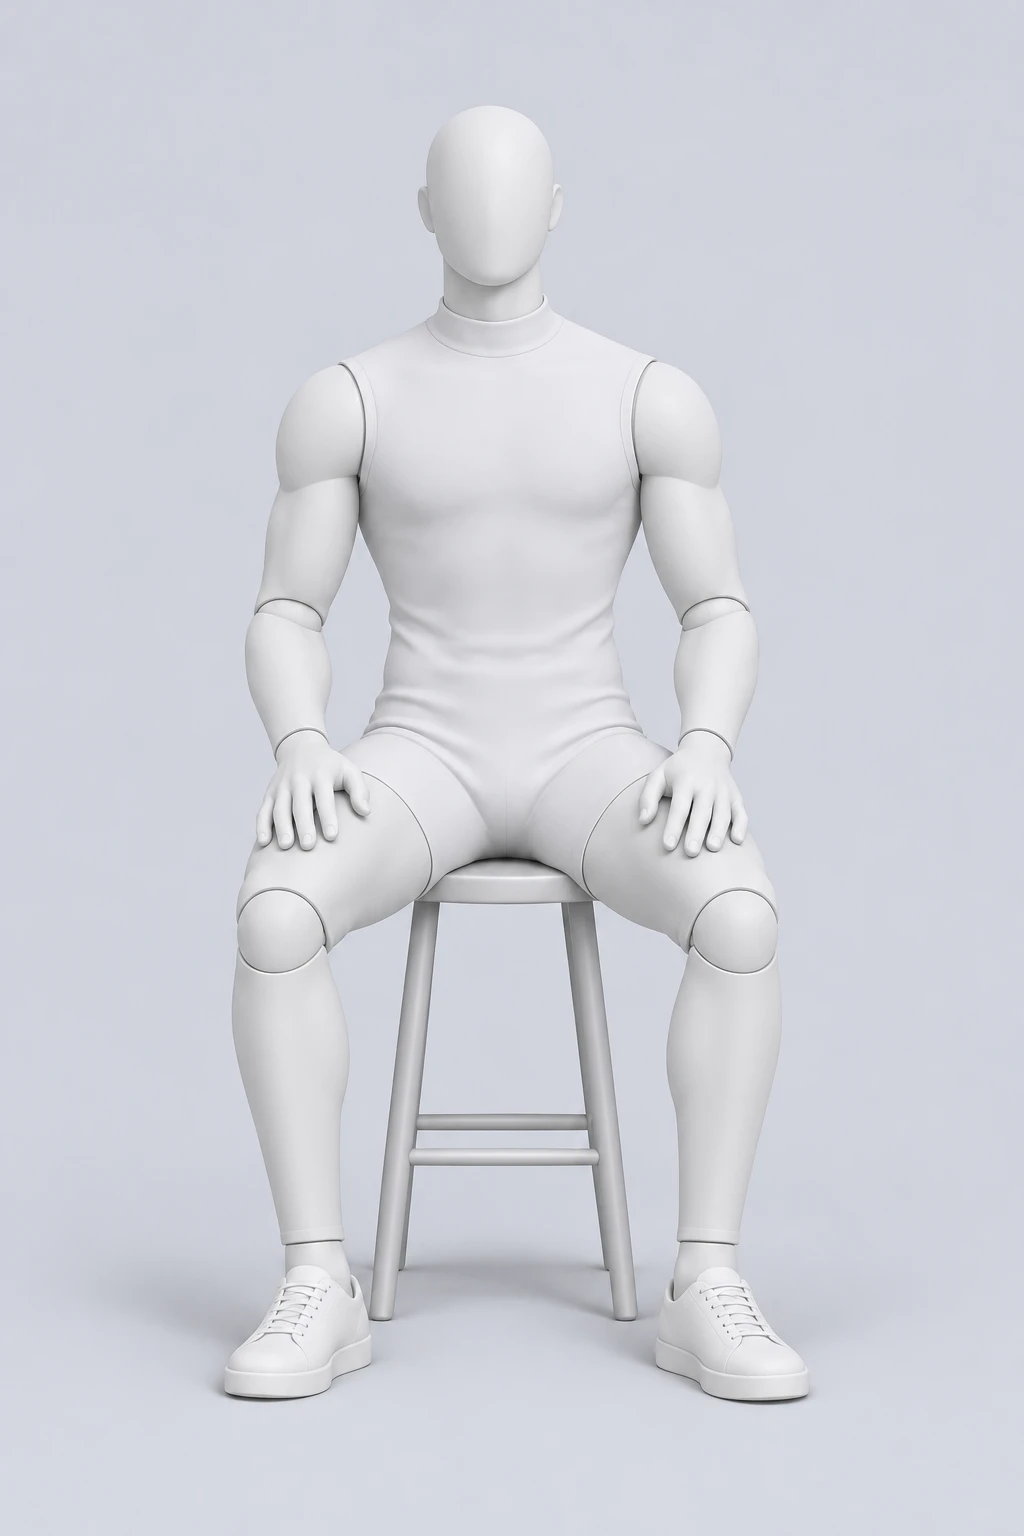
A straighter seated torso can suit a simple portrait. The seat height and foot position still need to fit the source.
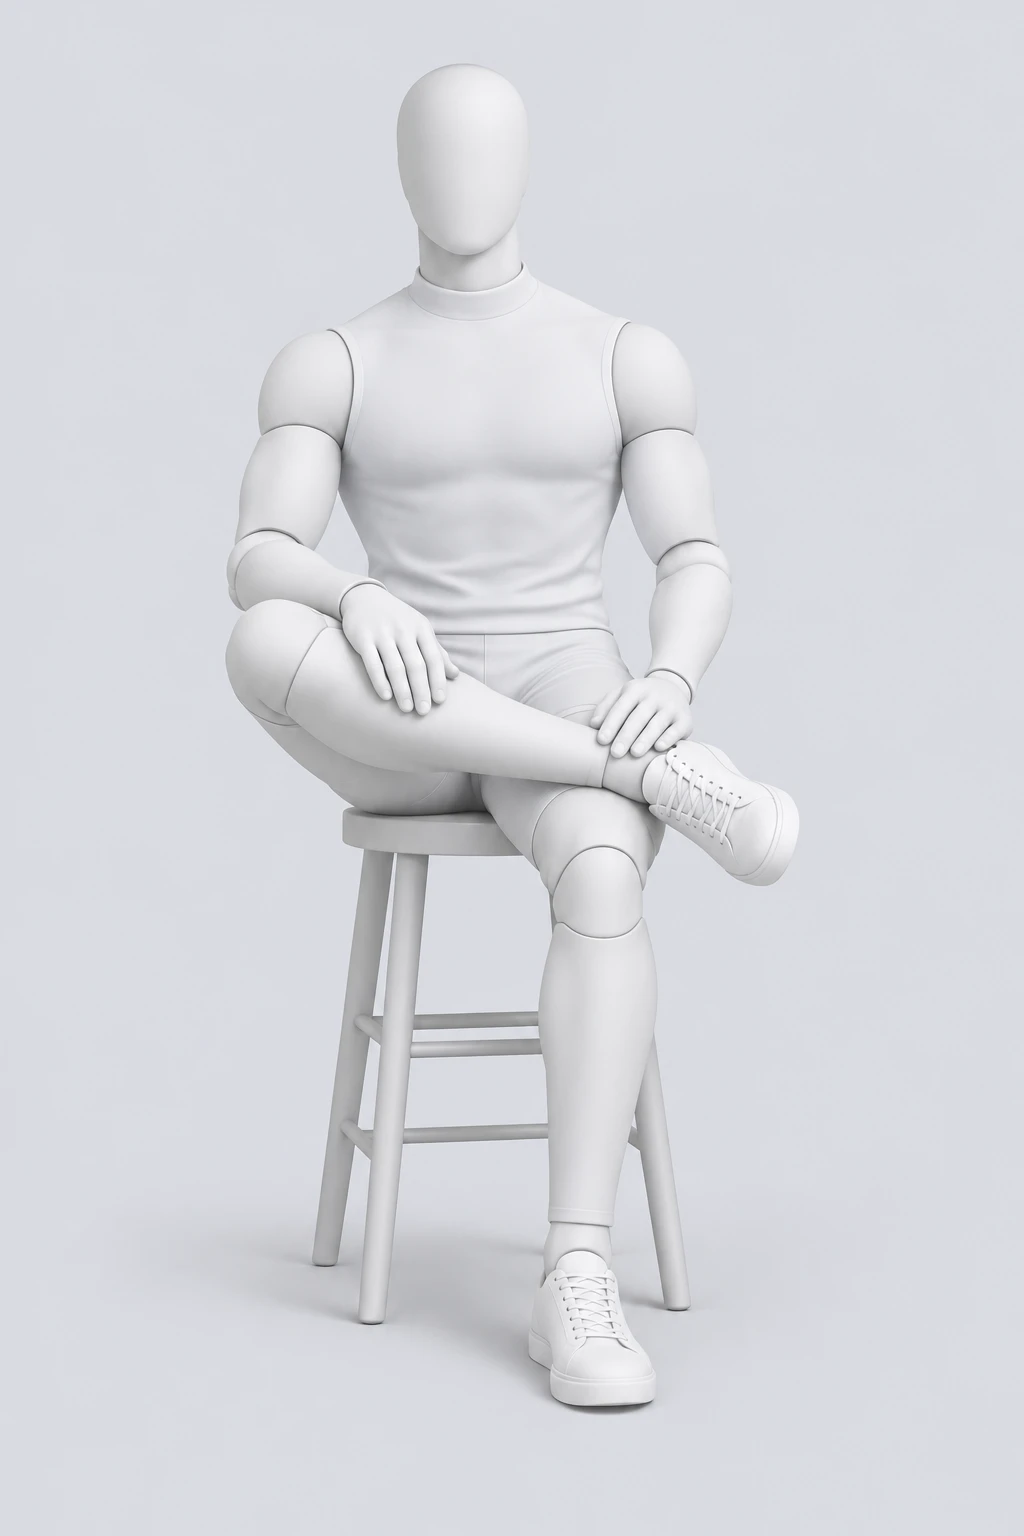
An ankle resting on a knee creates a wider lower-body shape. Leave space for the outward knee inside the crop.
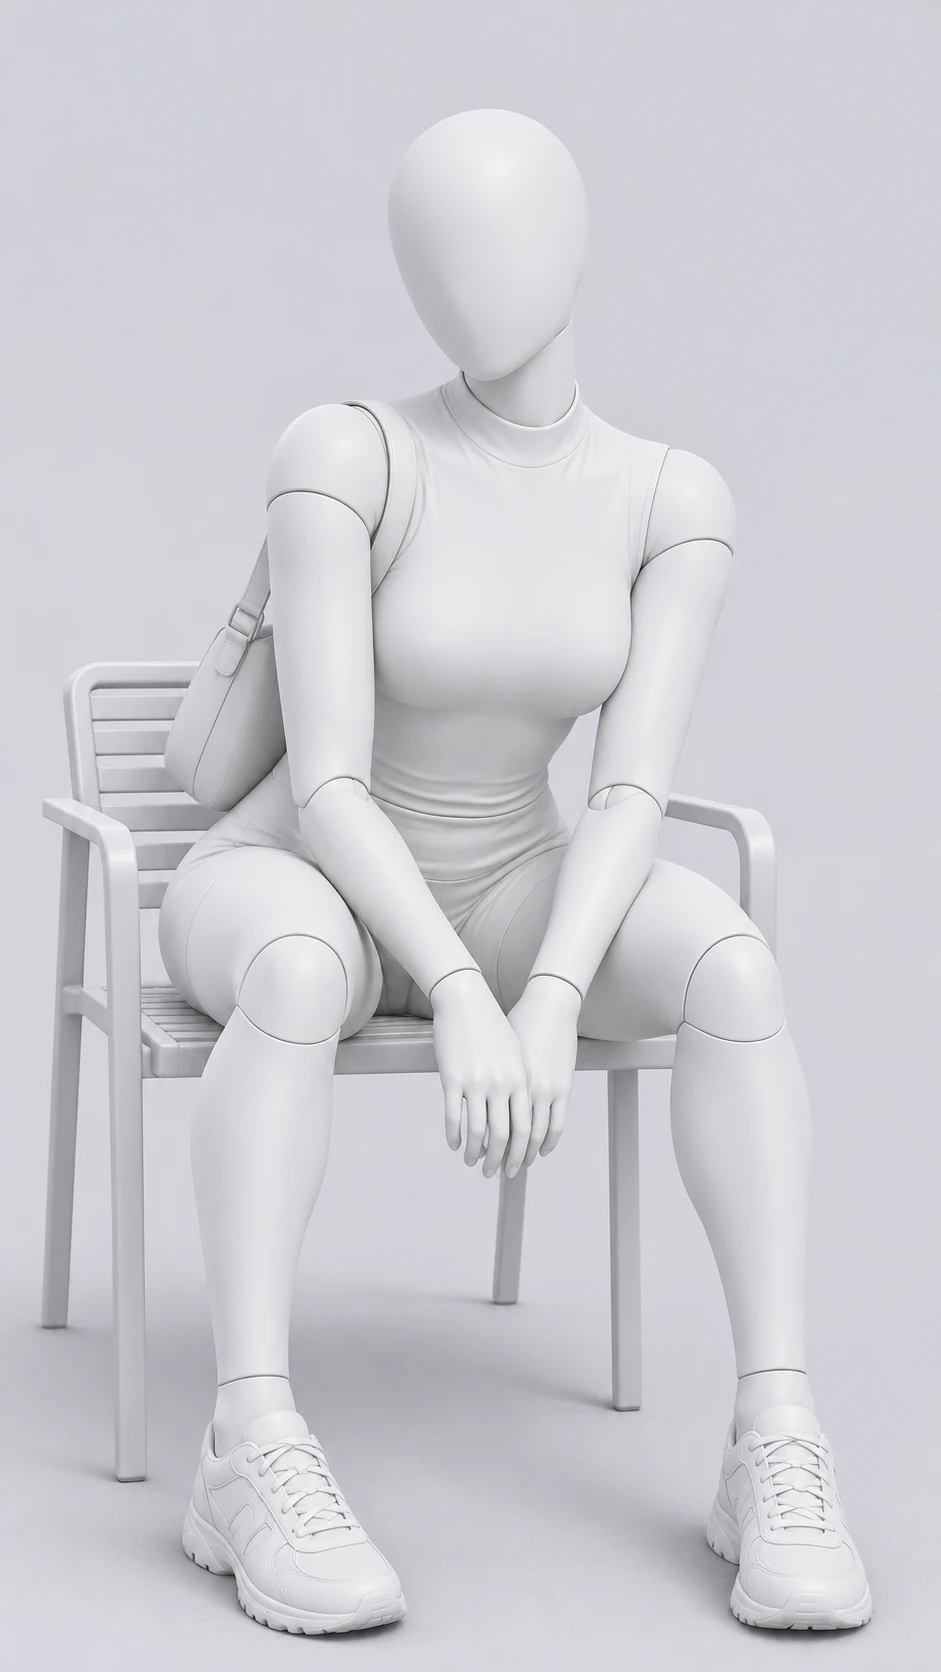
A seated forward lean changes the shoulder angle without needing a dramatic head turn. Compare the face direction separately.
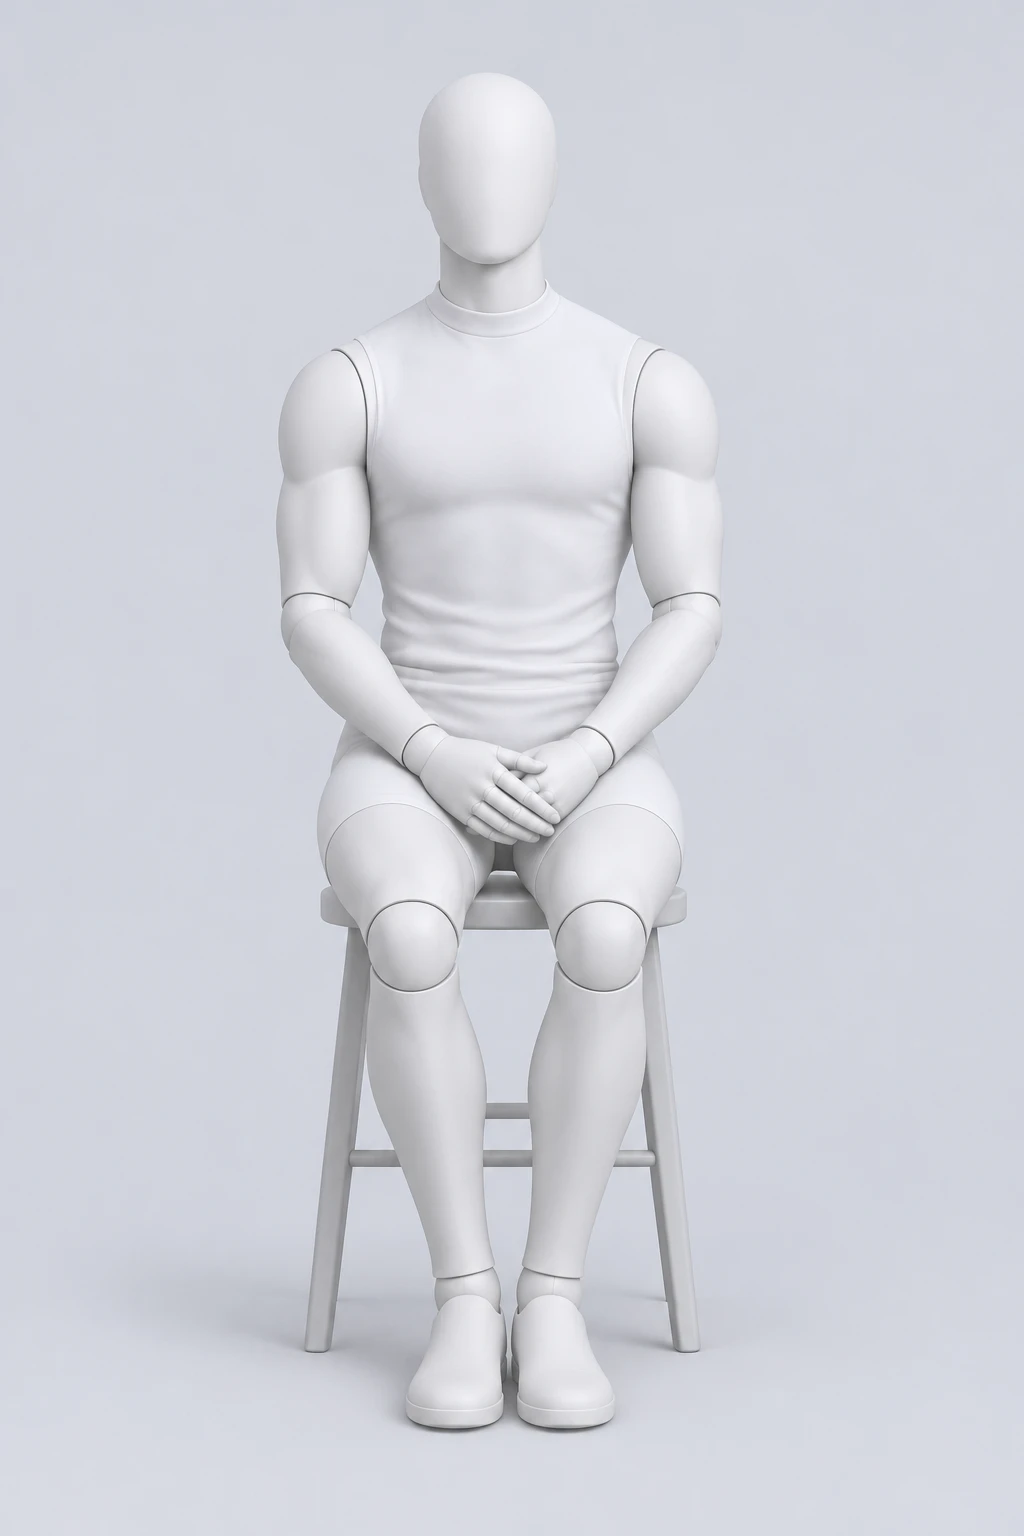
Hands resting in the lap keep the outline quiet. Check that the forearms meet the hands naturally.
A seated pose reference explains more than the angle of the back. The body needs a support surface, the hips need a plausible place on it, and the legs need somewhere to go. Before choosing an expressive gesture, identify the seat and the ground in your original photo. Those two surfaces determine which arrangements are easy to describe and which require a larger reconstruction.
If your source already shows someone sitting, begin with a reference that uses a similar seat height and body direction. A small hand adjustment or a gentler forward lean may be enough. If your source shows a standing person, changing to a seated pose also changes the lower body and may require a chair or stool. Describe that added support explicitly instead of asking the scene to remain completely untouched.
The white mannequins make the contact relationships easier to see without clothing patterns competing for attention. They do not determine the person’s proportions or the exact furniture in the result. Use them to communicate position, then inspect whether the pose has been translated convincingly to the original person and setting.
A tall stool and a low chair produce different knee and foot positions. On a high stool, feet may rest on a rung rather than the ground. On a lower seat, the knees may bend more sharply and the thighs may appear closer to horizontal. A reference with one type of support is not automatically compatible with another, even if the upper body looks similar.
Look at seat depth as well. Someone perched near the front of a chair has a different hip position from someone sitting back against a cushion. A deep sofa can hide the edges that help you judge contact. If the original furniture matters, keep its shape in the brief and choose a reference whose support arrangement is close enough to use without changing everything around it.
Armrests introduce another constraint. A hand resting on a knee cannot also rest on the armrest in the same position. Decide which contact you want. If the reference relies on an armrest that is absent from your source, borrow the shoulder direction while choosing a different hand placement. The instruction should resolve the mismatch rather than leave two incompatible supports in the scene.
A front-facing seated arrangement is a clear starting point for checking symmetry and support. It does not have to be perfectly mirrored: one hand can sit slightly farther forward, or the shoulders can relax differently. Start by comparing the pelvis position with the seat. Then check the direction of both knees and whether the feet have a plausible place to rest.
For a portrait that needs a tidy outline, hands on the thighs can be easier to read than overlapping fingers in the lap. However, the fingers may become visually prominent against plain trousers. Open the generated image at full size and inspect each hand independently. A convincing seated silhouette can still contain a local hand problem.
A forward lean moves the torso relative to the hips. It may bring the elbows toward the knees or simply bring the shoulders closer to the camera. Specify which version you mean. “Lean forward slightly, keeping the hands on the thighs” asks for a different arrangement from “rest both elbows on the knees.”
Check that the neck and head follow the intended relationship. A lean should not automatically become a deep downward gaze unless you want that expression. Clothing may gather at the waist or bend at the elbows, so compare the garment with your source. If the face remains important, keep its direction in the instruction and review likeness separately.
Crossed legs create overlapping shapes, which can make a seated portrait more visually compact or more asymmetrical. The crossing point matters: crossing at the knees differs from placing an ankle on the opposite knee. Choose the exact arrangement you want, and check whether the source crop leaves room for the outward leg.
Review the path of each leg from hip to foot. Do not judge only the visible shoe or knee, because an implausible connection can hide behind overlapping fabric. Long skirts, wide trousers and coats can obscure those relationships. A simpler seated reference may be more useful when you cannot clearly assess the lower body in the original.
Hands in the lap keep the upper-body outline quiet and can suit a restrained portrait. Choose whether the palms rest separately or one hand lies over the other. Those are small differences, but they change the visible fingers and wrist angles. If you use a clasped arrangement, inspect the overlap instead of assuming that the general shape is enough.
A hand gesture should also fit the seat and torso. Leaning far back while placing both hands near the front of the knees asks for a different reach than sitting upright. Compare the whole chain from shoulder to elbow to wrist. The reference helps explain that chain, while your prompt can specify the details that matter in the original.
Start by deciding whether the furniture stays or changes. If the original already contains a suitable chair, name it as the support to keep. If a new stool is necessary, say that it should be added. Then describe the torso, hands and legs in an order that makes the final arrangement understandable.
Use the mannequin for the seated body position. Keep the person on the existing chair, with the torso upright and both hands resting on the thighs. Keep the original face, clothing and room. Make the feet meet the floor naturally, and use the mannequin only for posture.
This wording is appropriate only when the existing chair and floor can support the request. Adapt it for a stool, a bench or a tighter portrait. Do not ask for visible feet when the crop must remain waist-up. If you want a wider result, acknowledge that the editor needs to create parts of the scene that the source does not show.
Avoid adding several alternative leg arrangements in one prompt. “Cross the legs, keep both feet apart, and put an ankle on the knee” describes different poses. Choose one reference and one lower-body arrangement. More detailed instructions help only when the details are compatible with each other and with the original.
In the November mannequin test, the source was a cropped standing portrait in a parking area. The selected reference showed an upright person on a stool. The prompt explicitly requested a stool, hands on the thighs and supported feet. The first generated result added the stool and extended the picture to show the seated legs and shoes.
That is a broader change than moving a hand in an existing seated photograph. The result demonstrates a translated seated arrangement in that example, while also showing why framing and reconstructed details need review. The source did not provide visible shoes or a seat to preserve. Inspect the original, mannequin and generated result together when deciding whether that level of change fits your own task.
If your intended use requires the exact original furniture, start with a source where it is already visible. If the goal is a new seated composition, allow the necessary support change and check it carefully. The best reference depends on which of those two tasks you are actually trying to complete.
Review the hip-to-seat contact first. The body should appear supported rather than floating above the furniture. Next, compare both legs and the way the feet or shoes meet the ground. Look at the chair legs and nearby floor edges, because a new body position can also change those parts of the scene.
Then inspect hands, sleeves and clothing folds. Bending the hips and knees changes how fabric gathers, so some new folds are expected. The important question is whether the garment still reads as the original and whether any essential logo, seam or accessory changed. For face checks, use the separate facial likeness guide rather than judging only the pose.
Keep the first result in your comparison record, even if you later refine it. Note whether you changed the reference, prompt or source between attempts. That helps you understand whether a better outcome came from clearer instructions or a more compatible starting photo. It also prevents a selected favorite from being mistaken for a typical first attempt.
You can request it, but the change may require new furniture, reconstructed legs and a wider composition. Use a reference with clear support and describe what should be added. Compare the result as a new seated arrangement rather than expecting only the knees to change.
Yes, for the visible shoulder, torso and hand relationships. A close crop cannot show complete seat or foot contact. Limit the instruction and your assessment to what the picture can demonstrate, or choose a wider source when the complete posture is essential.
Start with an upright arrangement that fits the existing seat. It gives you a simple baseline before trying a stronger lean or crossed legs. Once the support looks convincing, a smaller change to the hands or shoulders can be easier to evaluate.
Choose your reference, review the original, and describe the movement.
Open the pose editor