
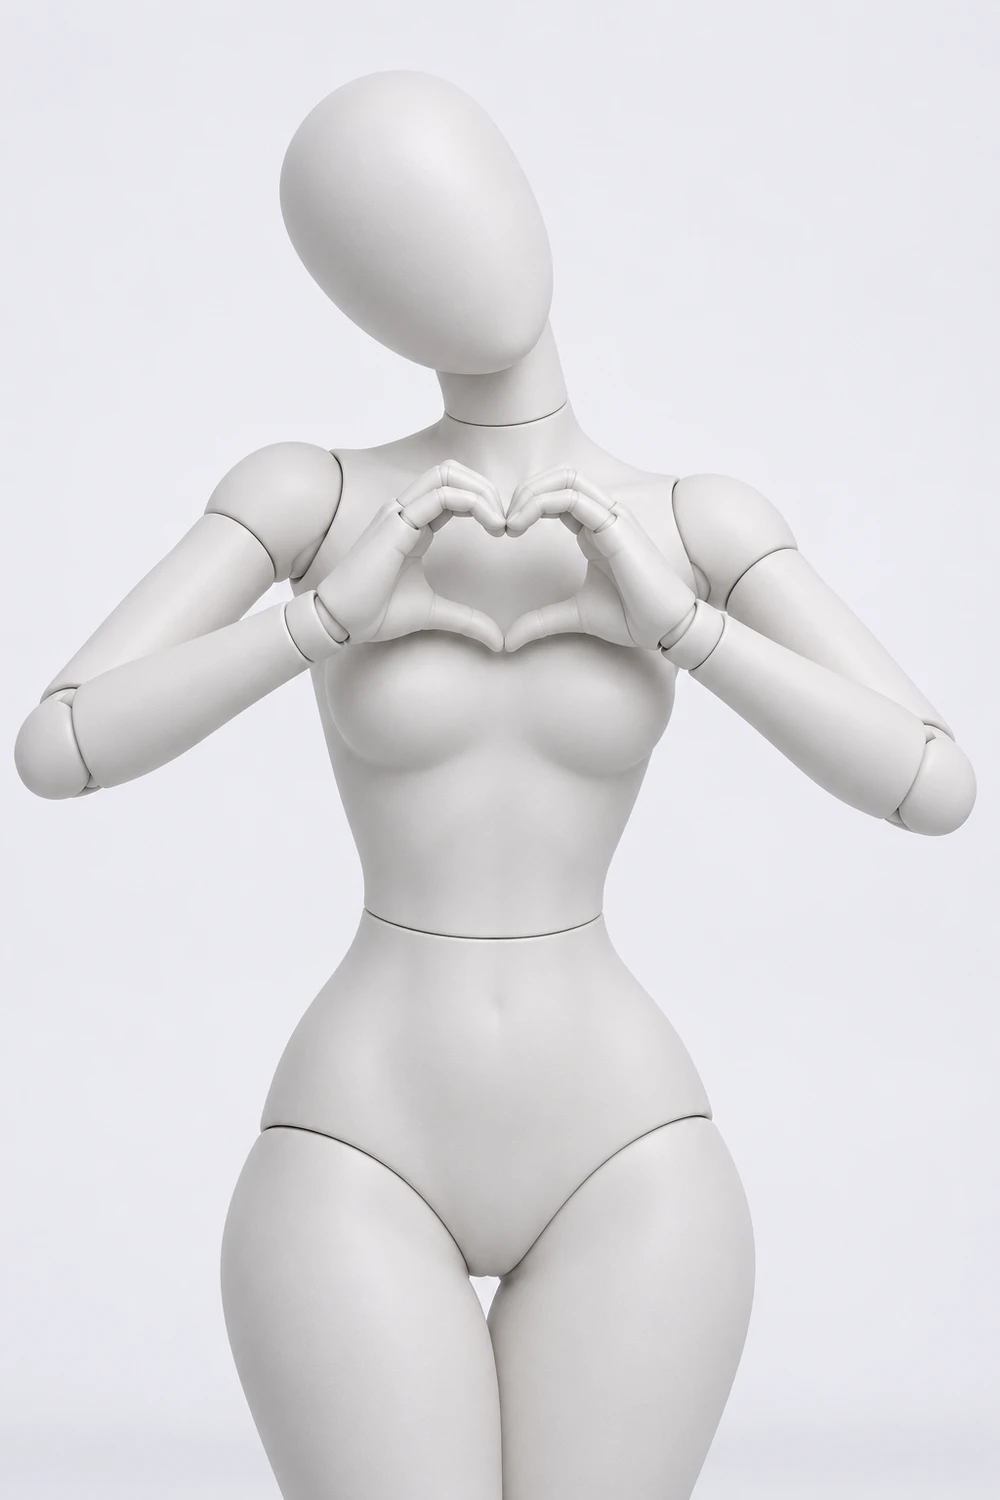
Heart hands · Half body
Both hands form a heart in front of the chest. Check the finger outline and the space between the hands.
Focus on the gesture inside your portrait. These mannequin references make shoulders, elbows, wrists and hand placement easier to compare.
Choose a guide below. Selecting it prepares your editor draft; generation starts only when you submit it.
Both hands form a heart in front of the chest. Check the finger outline and the space between the hands.
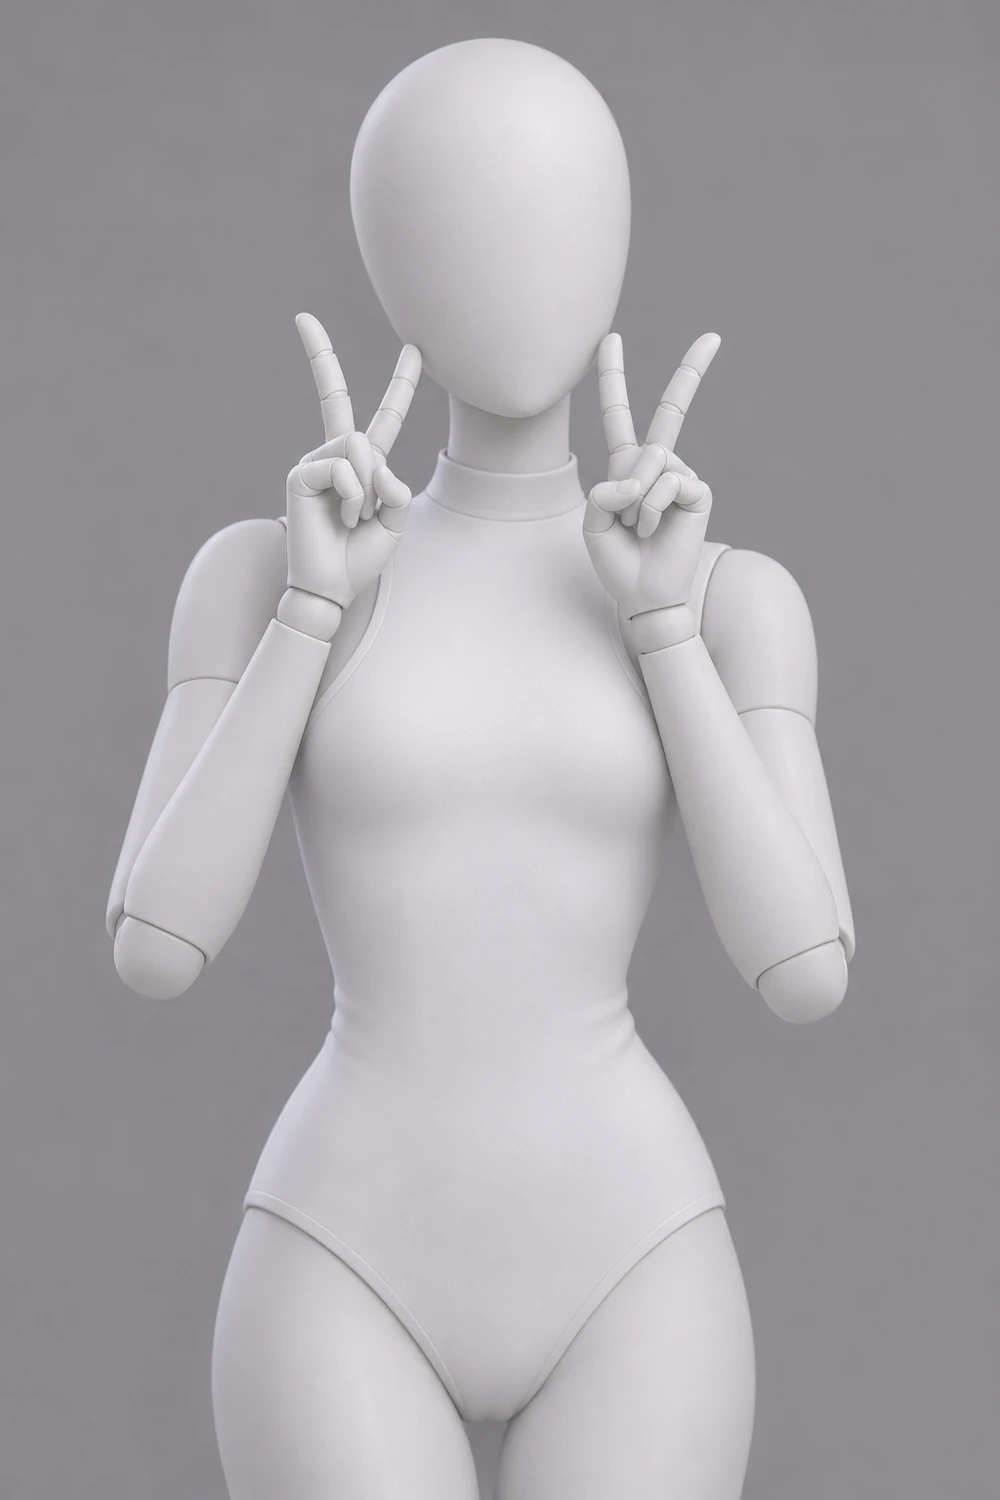
Two peace signs sit near the face. Keep enough room for both hands without hiding the eyes.
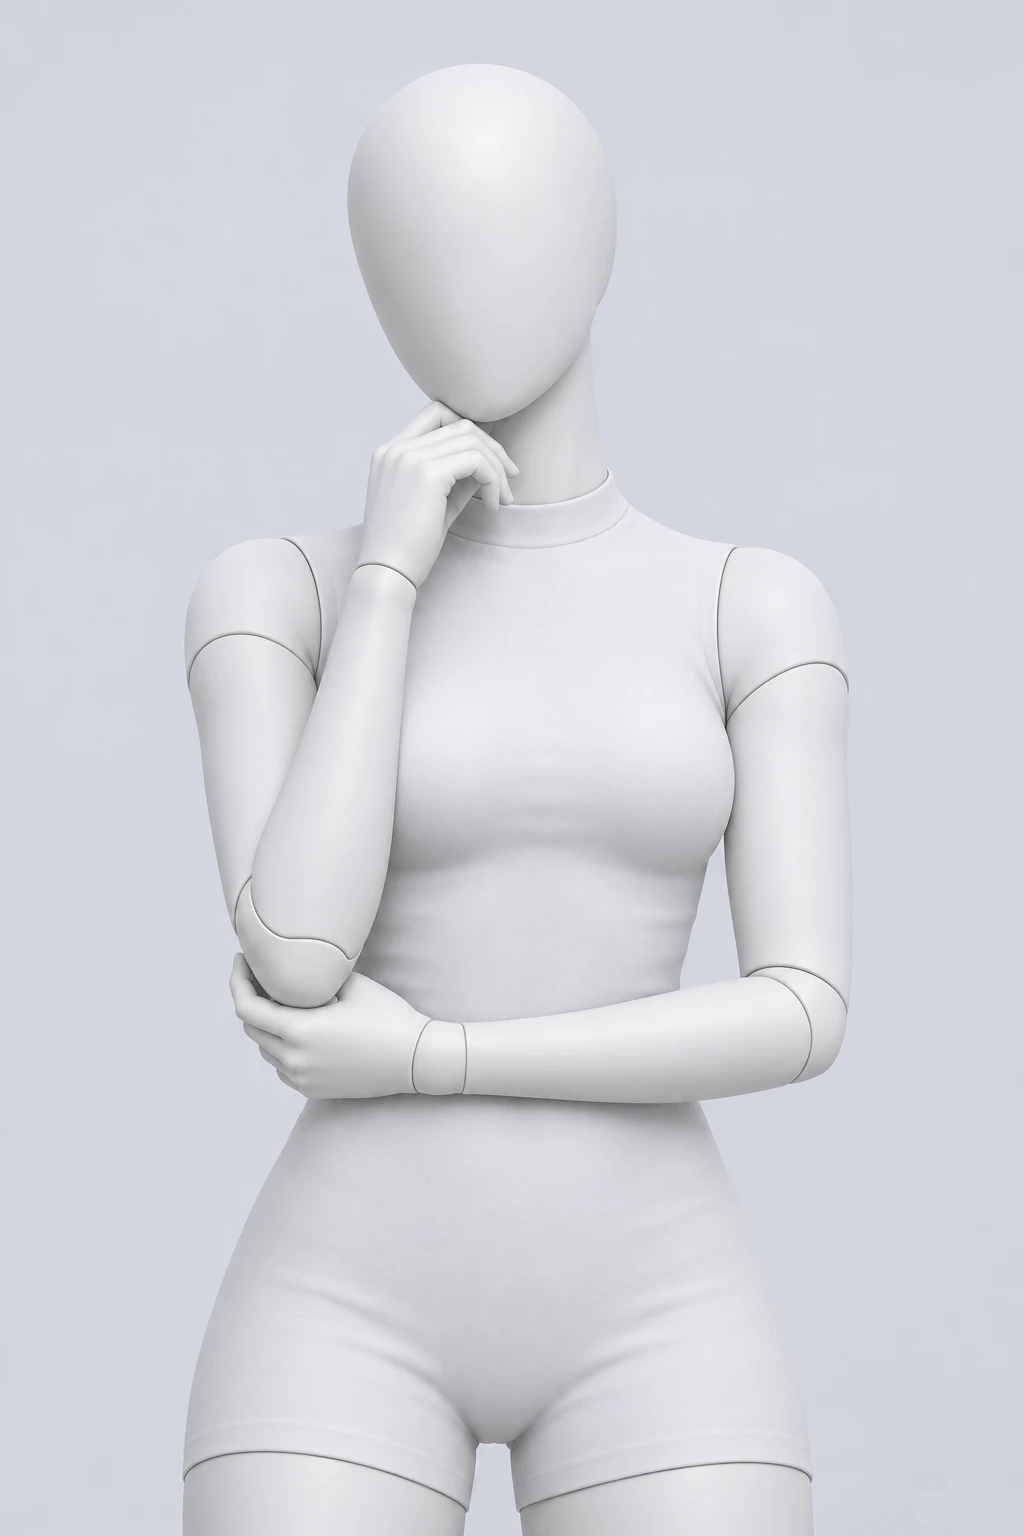
A hand supports the chin. Look at the wrist angle and decide whether the elbow needs a visible support.
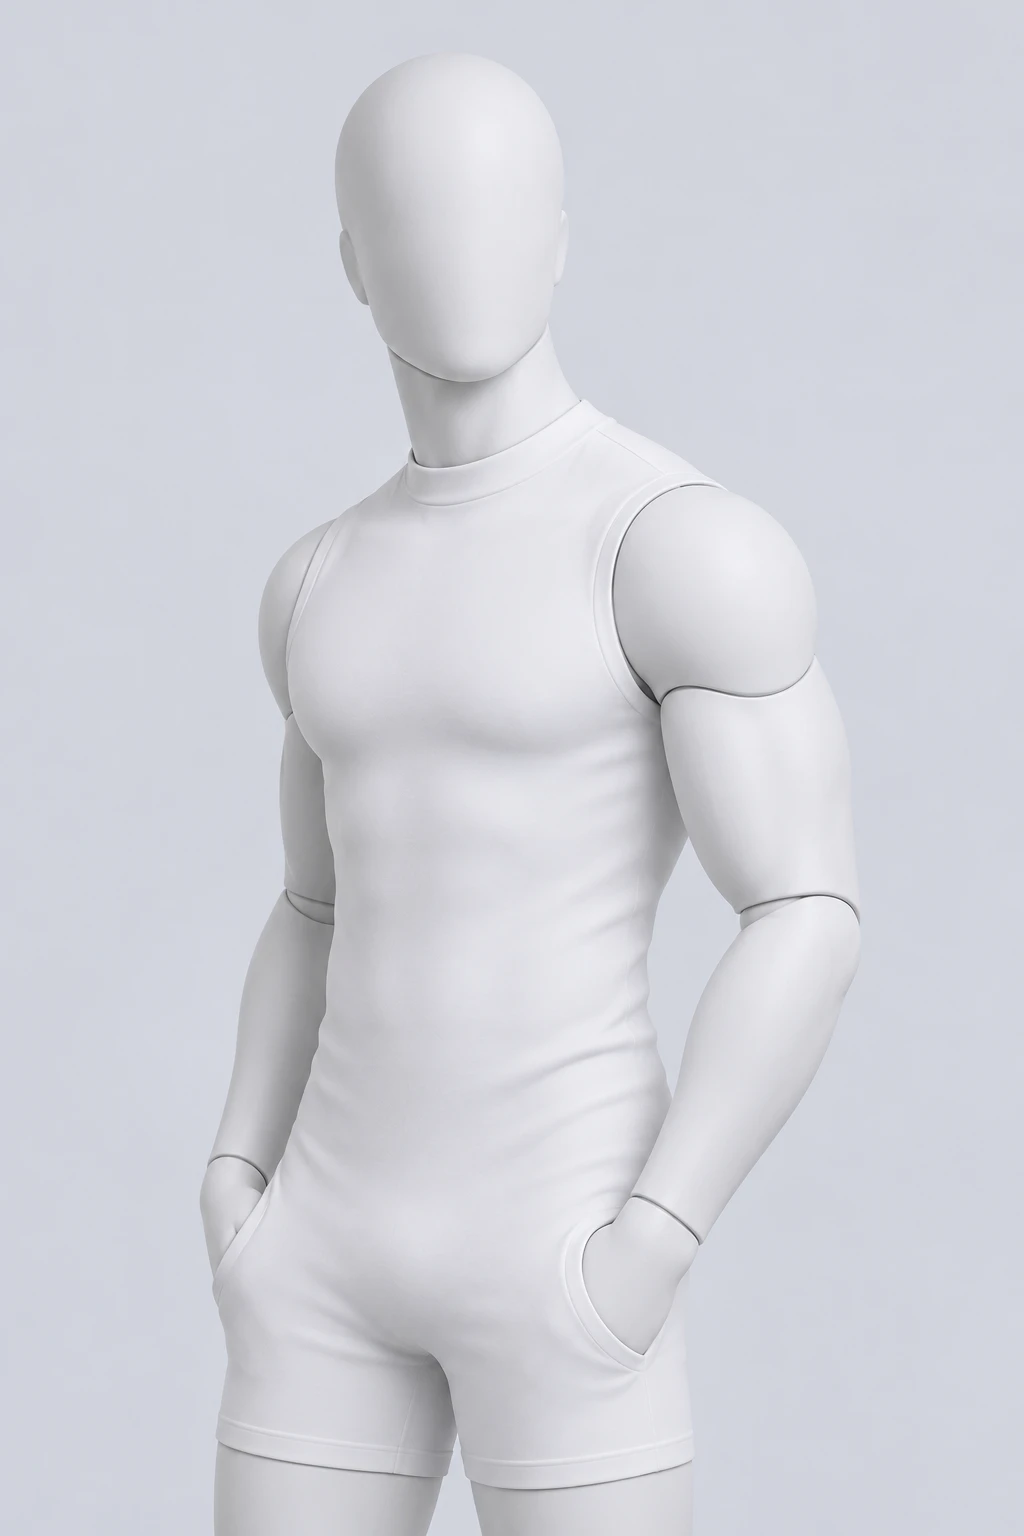
A shoulder turn changes the portrait angle. Specify the head direction separately if the face should remain forward.
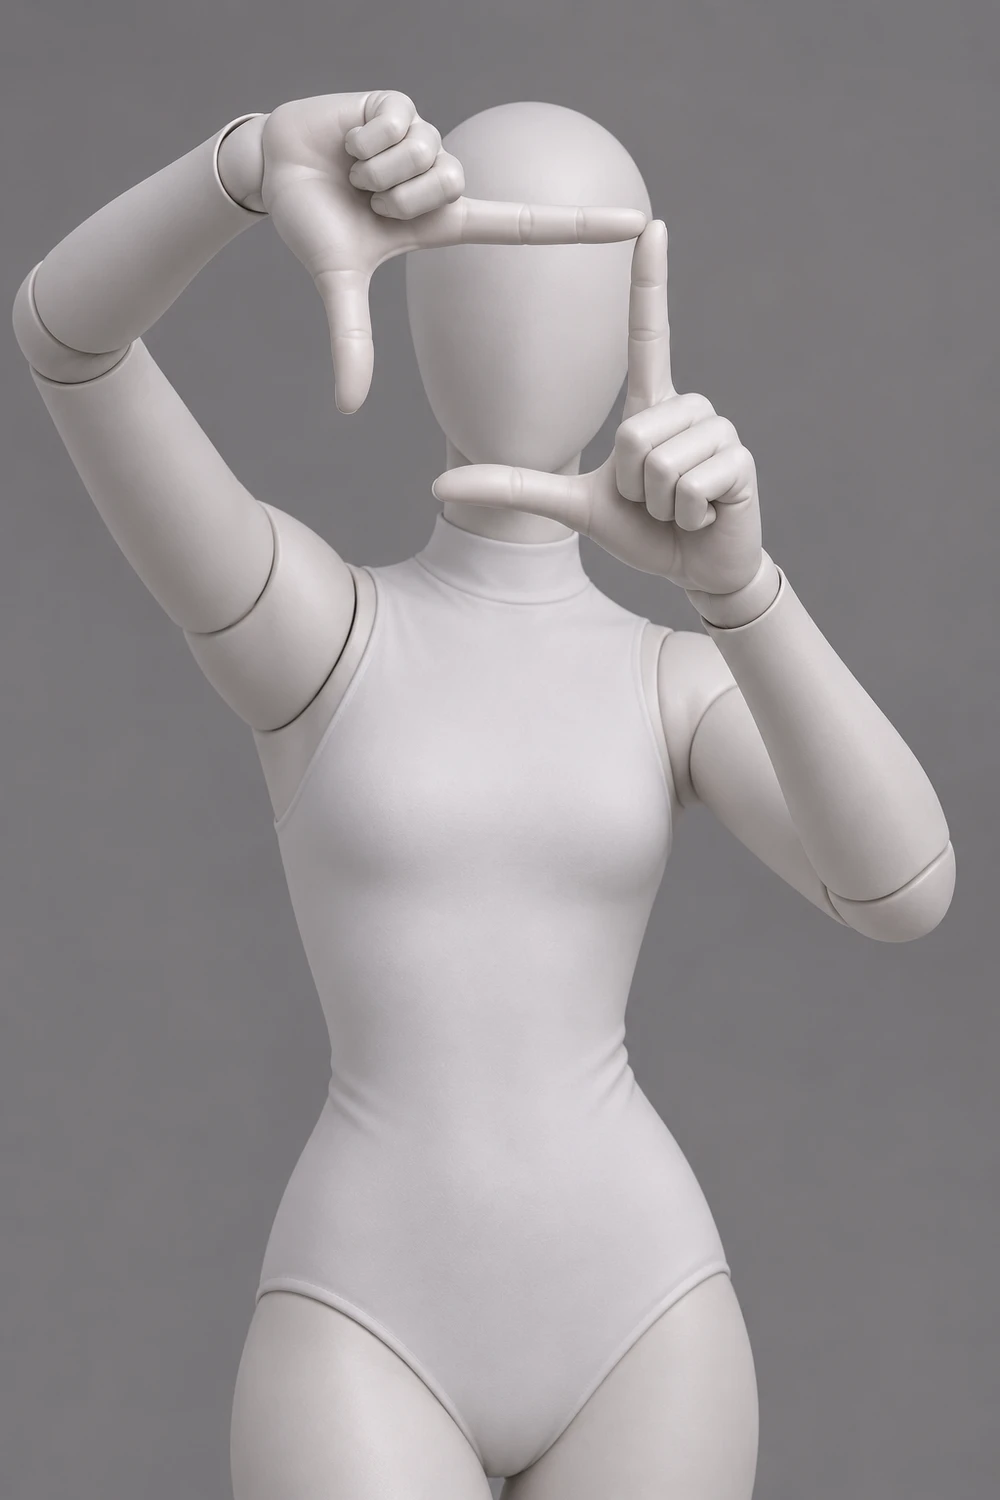
A finger frame creates deliberate overlap near the face. Inspect the connected corners and visible fingers.
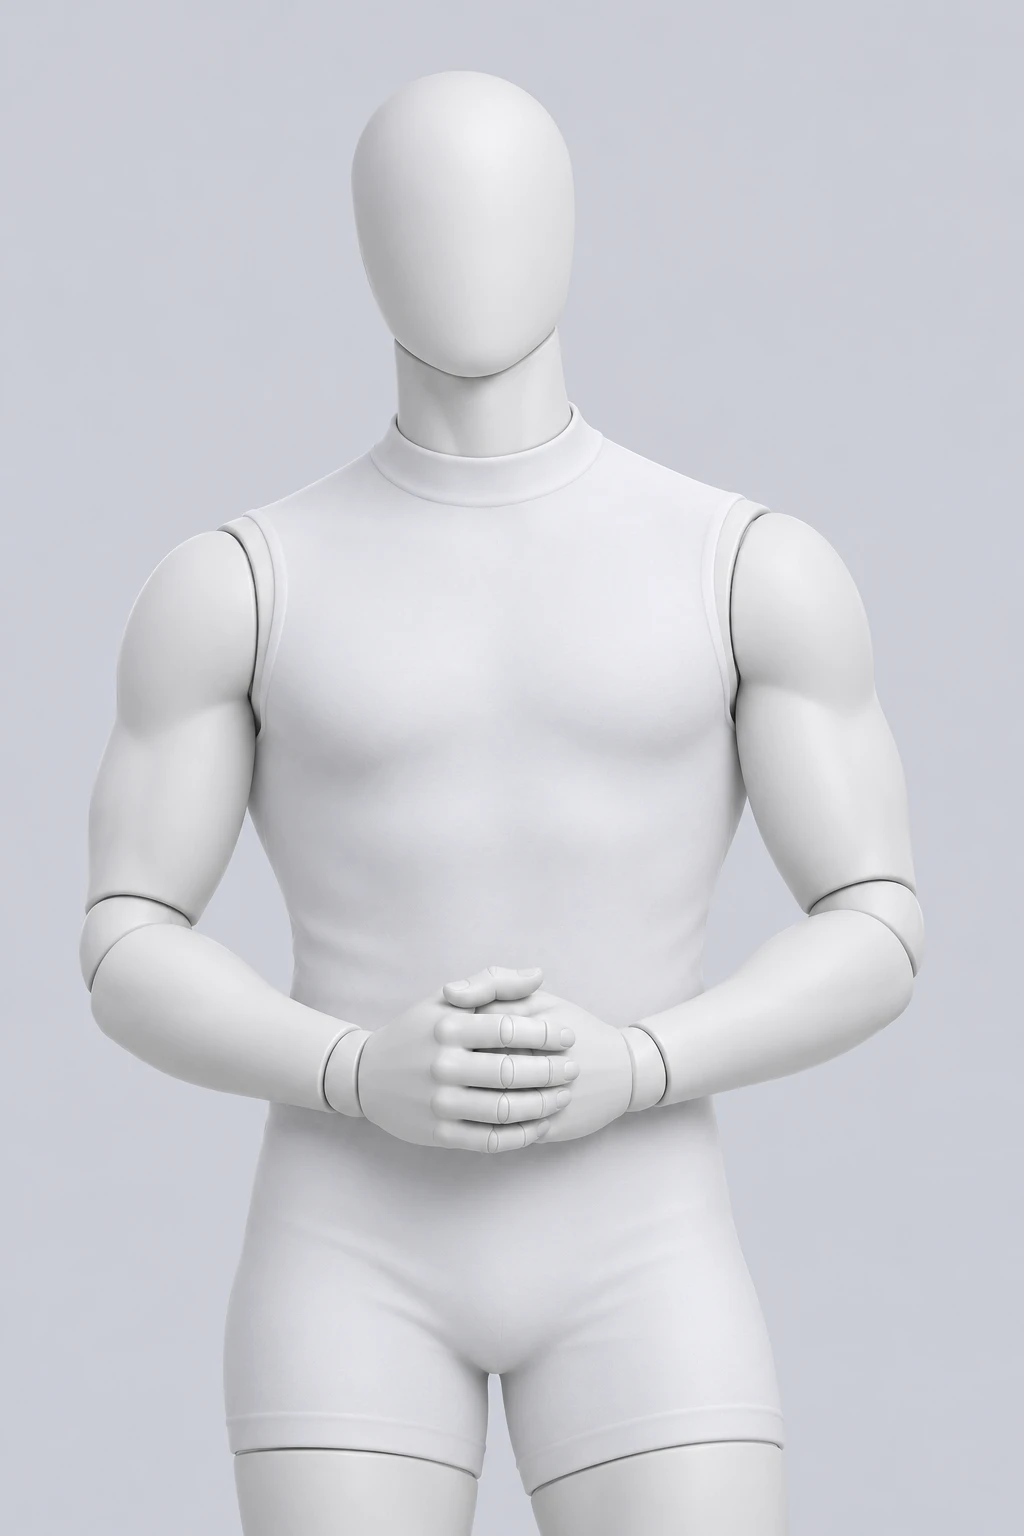
Clasped hands give the arms a shared destination. Check which fingers overlap and whether the shoulders stay relaxed.
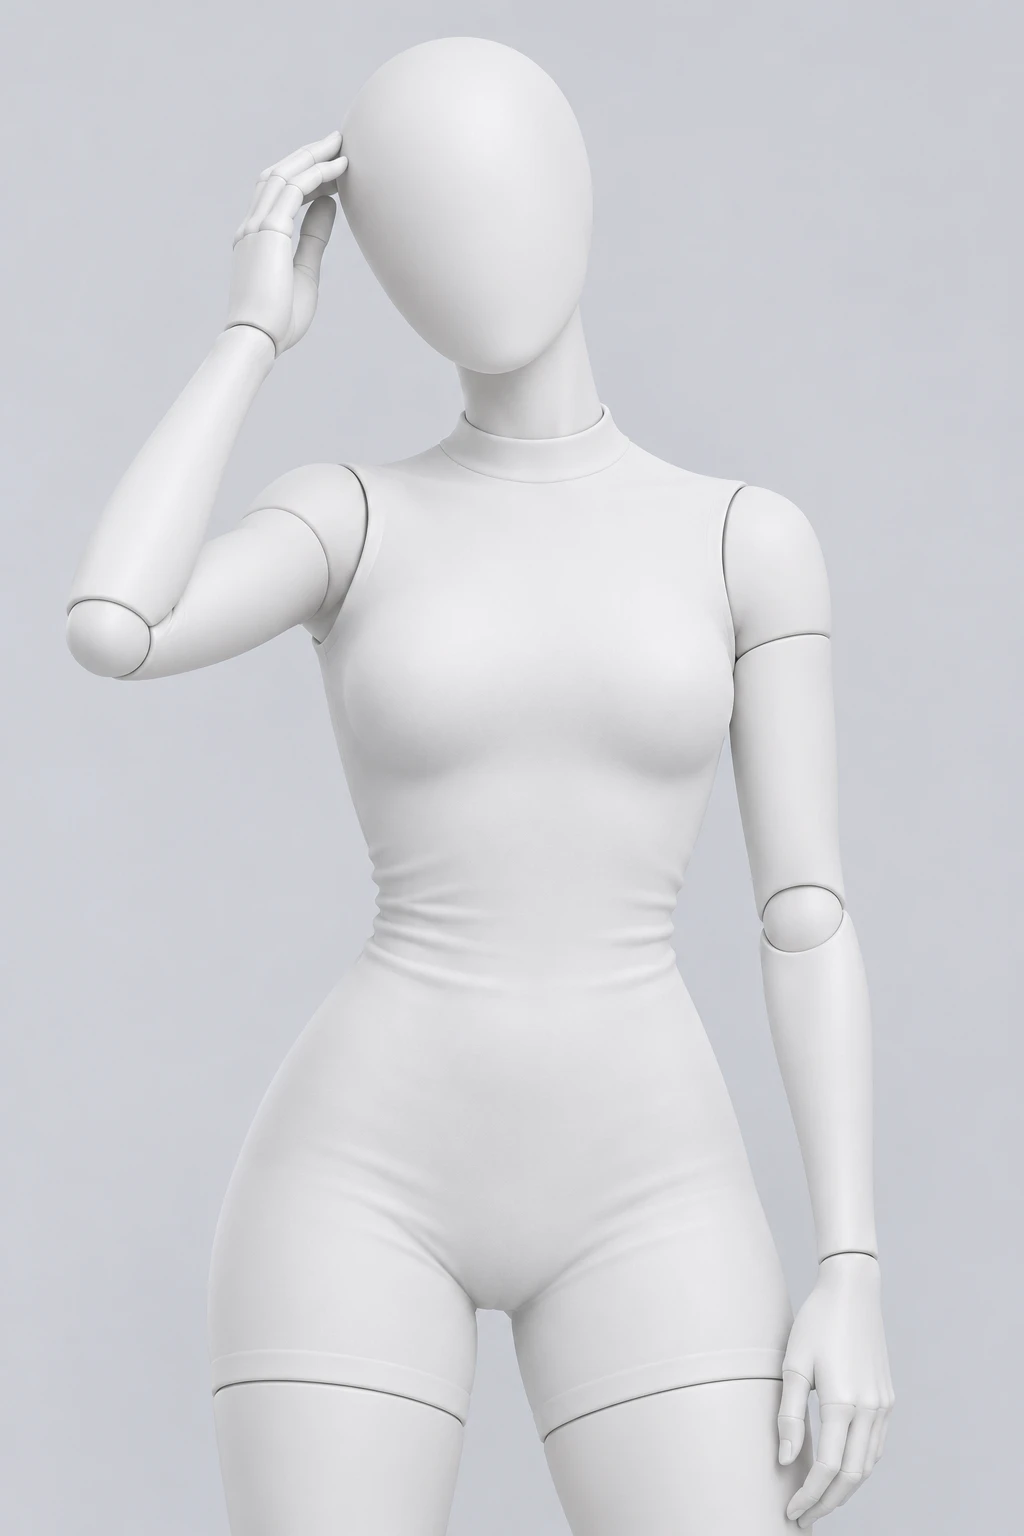
A hand moves toward the hair. Review the hairline, fingertips and contact around the head.
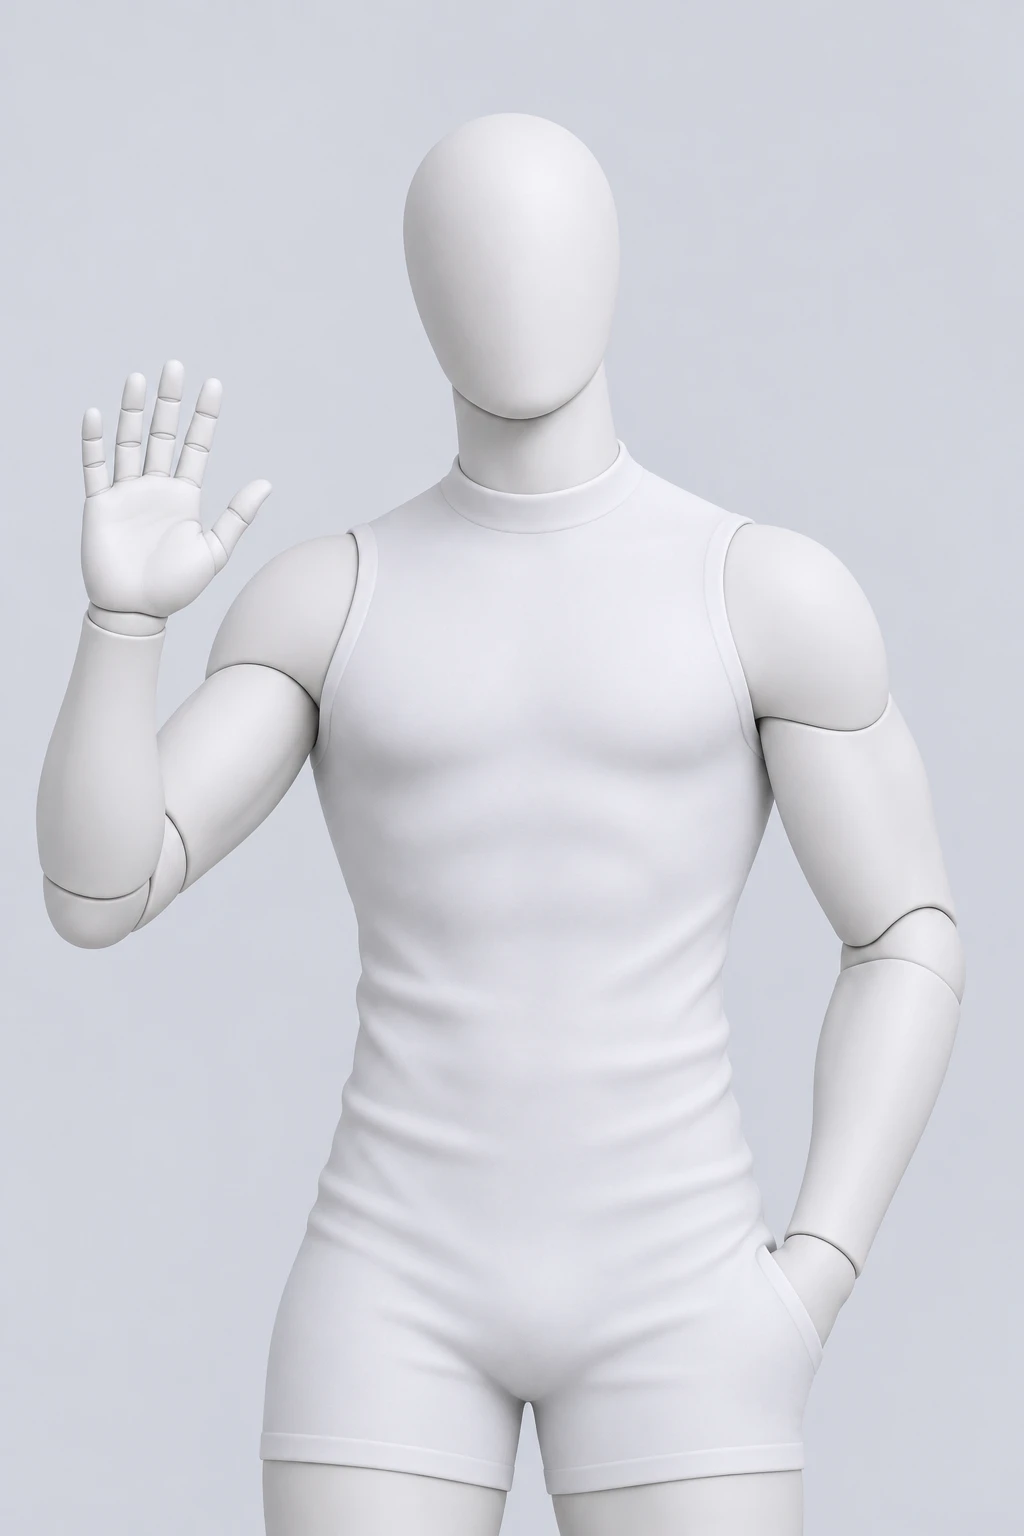
A raised open hand makes a simple greeting. Leave room around the fingertips and compare the wrist with the forearm.
A half body pose reference is useful when the important movement happens around the shoulders, chest or face. You do not need a complete walking stance to explain a hand under the chin or a relaxed shoulder turn. By choosing a closer reference, you can focus on the relationships that will remain visible in the final portrait.
Start by identifying the bottom and side edges of your original photo. A chest-up crop may not have room for the elbows in a wide gesture. A waist-up crop can show more of the arms but may still cut off a hand placed low at the hip. Choose a reference whose key joints fit within the space, or accept that a wider composition would require additional image content.
Half-body does not mean hands only. The shoulder line, torso direction and head angle give a gesture its context. If you copy the fingers but ignore the arm that carries them, the result can look awkward. Read the reference from the torso outward, then decide which parts of the arrangement should change in your original.
Each hand position depends on a connected chain. The shoulder sets the upper arm direction, the elbow changes the reach, and the wrist orients the palm. Before selecting a reference, check whether the entire chain is understandable. A hand near the face may look attractive as a thumbnail while hiding the wrist or elbow that explains how it got there.
A white mannequin helps separate the gesture from skin tone, jewelry and garment patterns. Use that clarity to compare joint relationships, not to impose the mannequin’s body shape. In your instructions, keep the person and clothing from the original. If the output should remain photographic, make the reference’s role explicit: body position only, with natural human appearance.
Consider sleeve length and fabric bulk. A short sleeve leaves the elbow easy to inspect; a loose jacket can hide it. A hand tucked into a wide sleeve needs a different visual check from a bare wrist. The pose should make sense with the clothing you actually want to preserve, rather than only with the uncluttered reference.
A two-handed heart creates a recognizable shape near the chest. It also asks the editor to resolve several fingers and two wrists at once. Choose a reference where the heart outline is clear and the elbows do not extend beyond your available frame. If the garment front contains important text or a logo, decide whether covering part of it is acceptable.
After generation, inspect the opening between the hands. The overall silhouette may resemble a heart even when individual fingers merge or bend oddly. Check both wrists and the contact between fingertips. In our November example, the first result formed a visible heart while keeping the photographic person; the three-image test comparison lets you inspect the details yourself.
A hand touching the face can give a portrait a more intimate or thoughtful arrangement, but it also introduces contact close to features that matter for likeness. Specify a light touch if you do not want the hand to cover the mouth or cheek. Look for a reference with a clear wrist angle and enough visible fingers to understand the contact.
Decide whether the elbow rests on a table, a knee or nothing visible. A strongly supported chin gesture may need a support surface that the original lacks. If your photo is a standing portrait, a light fingertip touch may be a better match than a pose that depends on a tabletop. Keep the source setting in mind before choosing the gesture.
A raised hand can change the mood of a portrait without requiring a major torso adjustment. Choose the hand height and distance from the face. A wave beside the shoulder creates a different shape from a hand held close to the lens. A peace sign near the eye can overlap facial features, so inspect whether the intended expression remains visible.
For two-handed gestures, compare the sides independently. The hands do not need to be perfectly mirrored unless that is your intent. Small differences can look natural, but an extra finger or an inconsistent wrist angle is a separate issue. Use the full-size image when assessing those local details.
If your goal is a less rigid portrait, a small shoulder turn may do more than an expressive hand gesture. Choose a reference where the torso rotates while the head remains at a useful angle. State whether the face should continue looking toward the camera, because body direction and gaze are separate choices.
Keep the hands simple when the shoulder angle is the main change. Clasped hands or relaxed arms can give them a clear destination without competing with the portrait. If the source crop does not show the hands, avoid adding a complex gesture merely to match every part of a larger reference.
A useful half-body instruction tells the editor where the hands go, how the elbows relate to the torso, and what should remain recognizable. Avoid asking for several incompatible gestures in the same request. Pick one reference, then use text to clarify the intended part of it.
Follow the reference for both arms and the heart-shaped hand gesture in front of the chest. Keep the original face, hair, clothing and background. Leave the eyes and mouth visible. Use the white mannequin only as a pose guide, and retain natural human skin and clothing.
This prompt describes a particular gesture; it is not a universal instruction for every reference in the collection. Replace the heart description when choosing a wave, chin touch or shoulder turn. If you only want one arm to change, say that directly and describe what the other arm should do.
Avoid vague requests such as “perfect hands” as your only guidance. They do not explain the hand location, palm direction or finger arrangement. Likewise, adding a long list of things that must never change cannot resolve a crop that lacks space for the requested movement. Make the geometry feasible first, then list the details that matter most.
Use the pose prompt examples for more wording patterns. Keep any instruction grounded in your chosen image rather than copying a prompt for a different arrangement. When you change references, reread the full text before generating so that an earlier gesture does not remain in the draft by mistake.
Hands near the head can cover eyes, mouth, cheek contours or the hairline. That may be intentional, but it affects how easily you can compare the person with the original. If facial likeness is important to your use, choose a gesture that leaves the key features visible and avoid a large head turn at the same time.
Compare the head angle separately from the hand pose. A reference may tilt the head to make room for the palm; copying the whole arrangement could change more than the gesture you wanted. Ask to borrow only the arm placement when the original face direction already works. Then inspect whether the output followed that narrower request.
Jewelry and accessories deserve their own check. A raised hand may reveal or obscure an earring, bracelet or necklace. Do not assume those details stayed intact because the clothing color remained similar. Open the original and result side by side, especially when the portrait is intended for a profile or an outfit presentation.
First look at the complete portrait. The gesture should read clearly and fit the person’s posture. Then inspect the hands at full size. Count visible fingers only where the pose actually exposes them, check the palm orientation, and trace the wrist back to the forearm. Overlapping hands naturally hide some fingers, so compare the anatomy with the reference rather than expecting every finger to be visible.
Next, check contact. Fingers touching the cheek should meet it plausibly; a hand under the chin should not float below it; clasped hands should overlap in a readable way. Look at the surrounding hair and fabric edges for changes introduced by the movement. These local checks are different from judging the overall attractiveness of the result.
Finally, compare the crop and background. A wider elbow position may change the available negative space, and a new arm can cover or reconstruct part of the scene. Decide whether those changes are acceptable for the final use. If only one local detail is wrong, focus the next attempt on it instead of adding a completely different gesture.
Yes, if the intended change is in the upper body. Say that the reference guides the shoulders and arms while the original lower-body arrangement should remain. Check the complete result afterward; the narrower reference does not guarantee that every other area will stay identical.
The reference is intended to guide body position. Keep the original person’s appearance explicit in your prompt and inspect the result. Our displayed mannequin tests retained a photographic appearance, but individual examples do not guarantee the same behavior for every input or instruction.
A simple, visible hand position with a clear wrist and elbow is easier to inspect than heavily overlapping fingers near the face. Start with the gesture that solves your actual portrait problem. A quiet shoulder turn can be more useful than a complex hand shape when posture is the main concern.
Choose your reference, review the original, and describe the movement.
Open the pose editor